
Why Your Product Photo Background Looks Gray—and How to Make It White
A white wall can look gray in a photo. Learn when to adjust the lighting, when to replace the background, and how to keep pale products visible.
See the edges on a new background
Switch the backdrop or check your own file. This checker runs on your device; it does not upload or remove anything.
PNG, JPG or WebP · Up to 10 MB and 12 megapixels
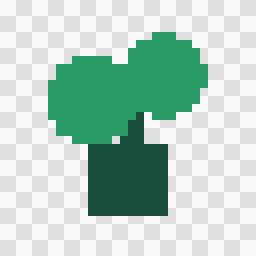
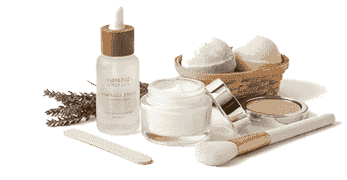
The product is an existing BGClear example. The fake PNG is a purpose-made illustration with an opaque checkerboard. These are teaching samples, not an accuracy benchmark.
In this guide
First decide whether the background or the whole photo is wrong
If the product itself looks dull or yellow, fix the light or white balance in your photo editor before removing anything. If the product looks right but the wall looks uneven, replace only the background. Raising brightness across the whole image can erase a white label or change the appearance of the item you sell.
Look at the sample above on white and dark teal. The same cutout can look more or less distinct without changing a single product pixel. The dark preview is a useful inspection surface even when the final image must be white.
Why a white wall photographs gray
The wall is part of the photographed scene: it receives shadows, reflected color and uneven light. A bright window on one side can leave the other side visibly darker. A camera may also choose an exposure that protects the brightest parts of the scene. More brightness is not always the solution.
Move the product away from the backdrop and use softer, more even lighting if you can retake the picture. Preserve the original so that a background change never becomes your only copy.
Replace the backdrop in BGClear
Open the white-background tool and upload a JPG, PNG or WebP. After removal finishes, open Background, choose Color and select white. The editor also has a custom color input: white is #ffffff.
Inspect the subject before downloading. Choose the output format and size that your destination needs, then download the image. Selecting white changes the backdrop; it does not guarantee that a marketplace will accept the photograph. Requirements can also cover framing, image dimensions and the item itself.
Keep white products and fine edges visible
A white bottle, silver necklace or pale garment needs enough edge contrast to remain recognizable. Preview the cutout on dark teal to find missing corners, holes or fragments. If a pale part of the product disappeared, a different background cannot restore those pixels. Retry with a clearer original or use a manual mask in an image editor.
A light gray backdrop may improve presentation where you are free to choose the design. Do not substitute gray if your destination explicitly requires pure white. The PNG guide explains how to inspect a cutout before flattening it.
Check the final downloaded file
Reopen the actual download, not just the editor preview. Check the product name and small lettering at the size customers will see. Check the file dimensions separately from its visual quality: making a small file larger does not recover lost detail.
For a product catalog, try a dark item, a light item and a reflective item before repeating the workflow. Keep a short naming convention such as product-code-white.png so that the edited photograph stays matched to the right variant.
Prepare a consistent set for your shop
Use the same backdrop and a similar amount of space around each product. A bottle that fills the frame and a bottle surrounded by wide margins will look like different sizes even if both files have the same pixel dimensions. Cropping and layout are separate steps from background removal.
If you sell through Google, read the dated Merchant Center image preparation guide before updating a feed. If you need help with an entire set, use the short enquiry below.
Frequently asked questions
Can I make the background whiter without changing the product?
Replacing the background affects the area behind the cutout. Always inspect the mask: automatic removal can accidentally remove pale parts of the product.
Why does a white PNG still look gray?
It may contain gray pixels, or a viewer may be showing its own backdrop behind transparent pixels. Check transparency and reopen the downloaded file on a different color.
Should I keep the shadow?
Keep or add a shadow only when it suits the destination. Inspect the original contact shadow after removal; it may be kept, softened or removed with the background.